The 3dRudder (available here) was first released in 2016 as a foot-operated controller for VR systems. It provides a more immersive experience by assigning common commands to your feet, leaving your hands free to interact in the VR-universe in more interesting ways. The 3dRudder is very sleek and intuitive, at least most of it is. Although the 3dRudder is better known for its application in gaming, it can act as a very capable mouse for those who have difficulty operating traditional handheld mice.
For the overall Pros/Cons list, skip to the bottom of this page.
The 3dRudder has several different software “modes”. This tutorial will only be focusing on the “Mouse” mode.
Unboxing/Packaging
The packaging of the 3dRudder looks and feels to be of high quality, and the unit itself is securely surrounded by foam. The 3dRudder comes with no instruction manual in the box. Instead, a small green card is included that directs the user to visit an instruction/download page of the 3dRudder website.


Physical Description
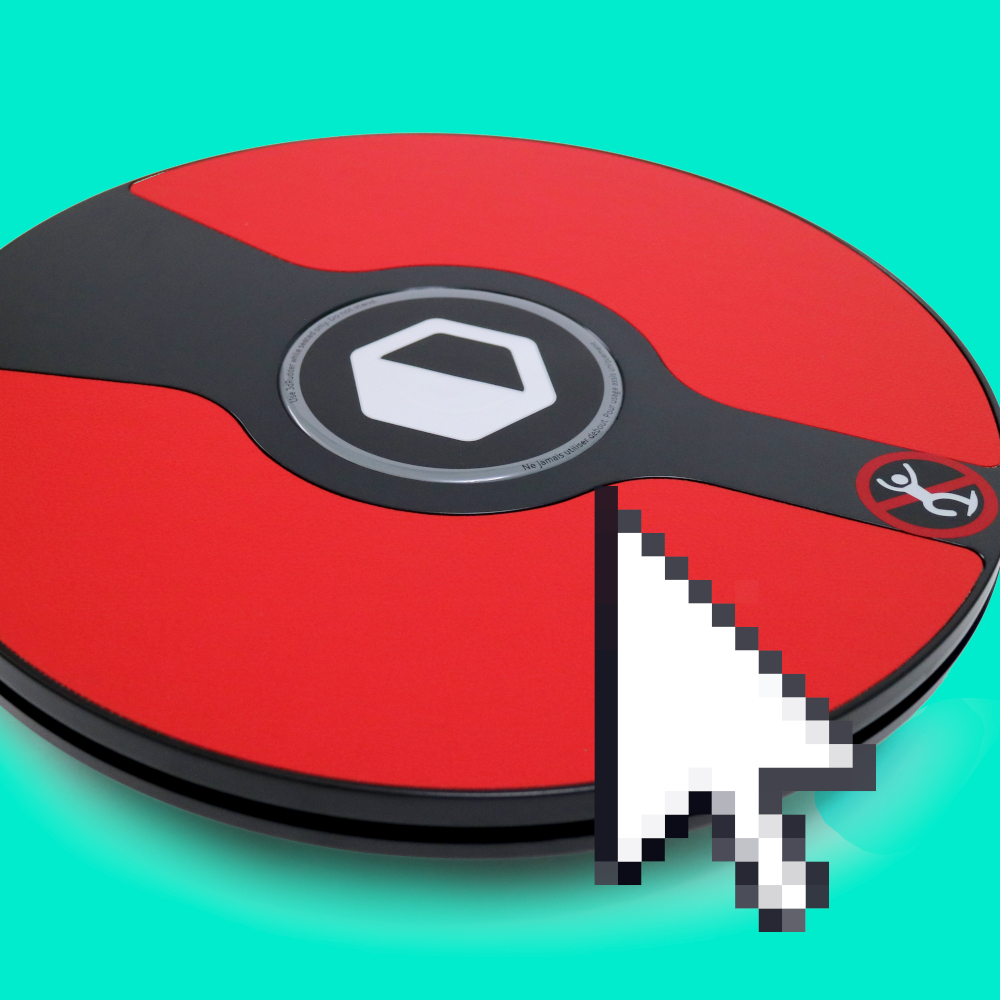
The unit itself is visually quite attractive, resembling a small red UFO. It is all one piece with no moving parts and no rattle when moved around or shaken. The plastic from which it is made is smoothly machined, shows no molding seams and has no rough points. The top of the unit is covered in rubber to keep your feet in place during use, as well as a small, non-removable sticker warning the user not to step on the unit with their full weight. The bottom of the unit is all black plastic, with black rubber covering the portion of the unit that comes into contact with the floor during use. At 3 pounds 14.9 ounces, the unit is slightly hefty while remaining lightweight. The 6-foot cable allows for flexible positioning into your existing computer hardware system and can easily span the better part of a room. The overall dimensions of the 3dRudder (not including the cable) are 13 3/8 in (L) by 13 3/8 in (W) by 2 5/16 in (H).


Initializing
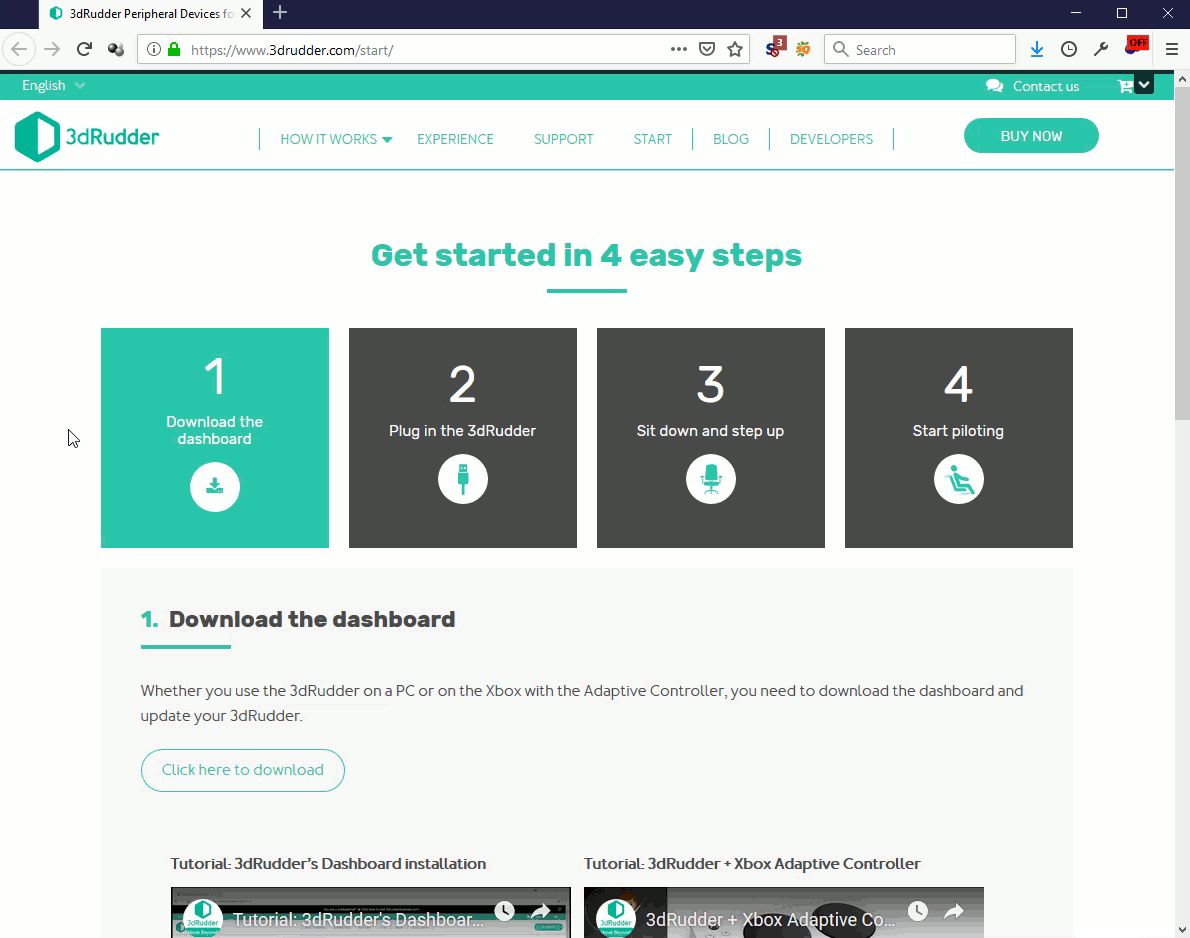
Before the unit is plugged in for the first time, the 3dRudder dashboard software needs to be installed onto the user’s computer. As mentioned before, the only instructions that the 3dRudder comes with are on a little green card directing the user to visit https://www.3drudder.com/start/ and download the software. Without it, the unit will not work. Now would be a good time to mention that the 3dRudder is a WINDOWS-ONLY device. When you visit https://www.3drudder.com/start/ you will see a download link for the dashboard software. The dashboard installation runs as a typical Windows installation; after the download is finished, just double click on 3dRudderDashboard_Setup.exe, follow the installation prompts, and you’ll be ready to continue.
Towards the end of the installation process, you will be asked whether you want to install “UnleashedVR”, a driver for SteamVR. This is a driver for Steam users (gamers) and has nothing to do with the mouse functions of the 3dRudder. If you are using the 3dRudder solely as a mouse, you can click cancel here.
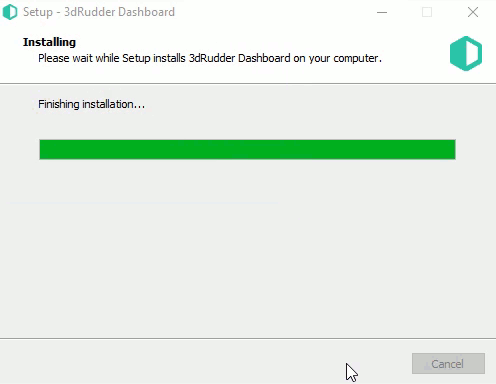
After installing the dashboard, you will need to run it for the first time. At first launch, the dashboard will guide you through the initial connection and configuration of the 3dRudder. It will even give you a small interactive tutorial on how to operate the unit properly. This process should be extremely painless, as the software practically holds your hand during the configuration with second-by-second instructions. You will go through a series of steps, starting with connecting the 3dRudder for the first time, downloading updates for both the dashboard and the firmware of the device, calibration, and the aforementioned interactive tutorial.

The 3dRudder needs to be in constant communication with the software in order to function. Luckily, there is no need to manually turn on the dashboard whenever you want to use the device. During the installation process, two things happen that make this possible:
- The dashboard is set as a startup program. Whenever your Windows system boots up from now on, the dashboard will automatically turn on in the background.
- A background process called “3dRudder Service” is started that remains active even when you quit the dashboard.

 is set as a startup program.")
Although the 3dRudder is not a plug-and-play device, these background processes bring the user extremely close to a true plug-and-play experience.
Configuration and Use (device should be plugged in by now)
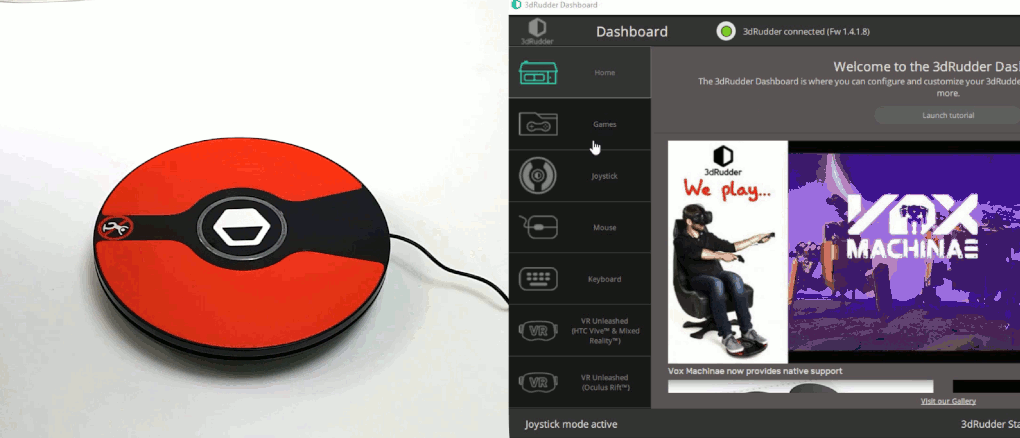
Because the 3dRudder is a device originally intended for VR users, its default mode upon installation is going to be “Joystick” mode. To use it as a mouse, it must be switched to “Mouse” mode. From the dashboard home screen, simply click on the “Mouse” menu button on the left side of the dashboard window, and then click on “Activate Mouse Mode” at the bottom right of the window. The dashboard will take a few seconds to configure the device, and then it will be ready for you to place your feet on it and use it as a mouse.
At this point, the 3dRudder is already fully functional as a mouse. However, it is very likely that you will want to adjust the control sensitivities to suit your particular style of use. I personally had a profoundly difficult time using the 3dRudder with the default settings (too sensitive for me). Before we discuss how to adjust the controls, however, it’s important to know what those controls ARE.
In Mouse mode, the 3dRudder is capable of the following mouse actions:
- Mouse Move (Pointer Position):
- Up – Performed by tilting the device forward (toes down, heels up)
- Down – Performed by tilting the device backward (heels down, toes up)
- Left – Performed by tilting the device to the left (left foot down, right foot up)
- Right – Performed by tilting the device to the right (right foot down, left foot up)
- Clicks:
- Left Click – Performed by pressing and HOLDING your left toe and right heel down, waiting for a single beep, then releasing the pressure on the device
- Double Click – Same as left click, but waiting for two quick beeps
- Drag/Hold-Click – Same as left click, but waiting for one long beep
- A note on the preceding three click commands: It may be worth explicitly stating that double-clicking is NOT accomplished by physically double-pressing the device with your feet. The same is true about drag-clicking. The physical movement of the feet required to trigger all three of these click commands is identical, the only difference being in the length of time the user holds the pressure with their feet on the unit. The user must press their left toes and right heel into the device, and hold that position while the 3dRudder cycles through the click commands and emits auditory feedback in the form of beeps.
- Right-Click – Performed by pressing and holding your right toe and left heel down, and releasing the pressure on the device when a beep is heard
- Scrolling:
- Scroll Up – Performed by pivoting the device counterclockwise
- Scroll Down – Performed by pivoting the device clockwise


Configuring the mouse mode parameters
The “Mouse” section of the dashboard allows you to adjust every parameter of the 3dRudder’s mouse output. It is divided into several sections pertaining to mouse movement, left click functions, right click, and scrolling. The controls on this page are editable only if Mouse mode is currently active, so be sure to enable Mouse mode before trying to adjust any parameters.
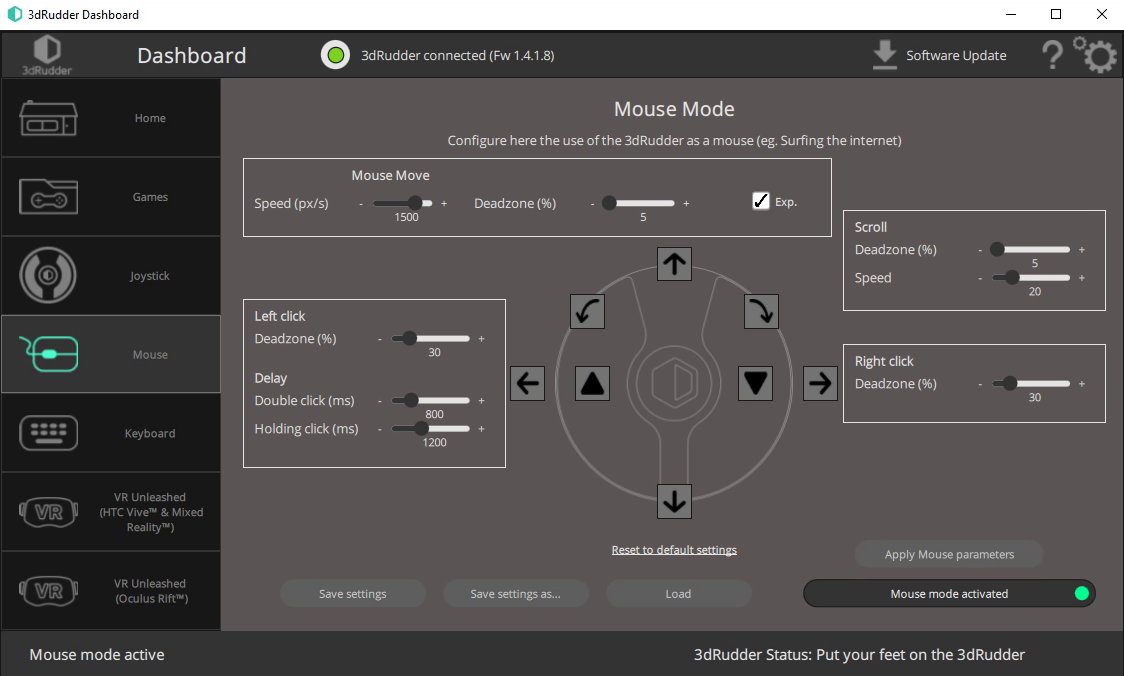
When making adjustments to any of the following parameters, you will not see instant changes upon moving a slider or checking a box. Changes are only seen when the “Apply Mouse Parameters” button on the bottom right of the dashboard is pressed. Keep this in mind to avoid frustration over not seeing immediate feedback.
- Mouse Move
- Speed: This parameter works as a standard mouse speed slider. Increase its value to make the mouse move faster, and decrease it to make it move slower.
- Exp: Stands for “Exponential”. Leave this box checked to have the speed of the mouse cursor accelerate or decelerate based on how intensely the 3dRudder is being tilted. Small tilts of the unit will result in slow cursor speeds and large tilts will result in fast cursor speeds. Uncheck this box to have the mouse cursor move at a more (but not fully) constant speed.
- Deadzone: See below
- Left Click
- Double Click Delay: The time in milliseconds it takes for the 3dRudder to cycle to the double-click command from the moment a single click is triggered.
- Holding Click Delay: The time in milliseconds it takes for the 3dRudder to cycle to the holding-click command from the moment a single click is triggered.
- A note on click delay times- Because the delay times for both the double-click and holding-click refer to the initial single-click, it is possible to set both delay times to be identical or very close to one another. This is undesirable and may result in the 3dRudder not cycling properly between the click commands. It is recommended that the holding-click delay time be set to a HIGHER value than the double-click delay time and NOT vice versa. If the holding-click occurs before the double-click, the double-click may end up not being triggered at all. (Based on my own testing of the 3dRudder.)
- Deadzone: See below
- Right Click
- Deadzone: See below
- Scroll
- Speed: Controls how fast scrolling occurs when triggered by the 3dRudder.
- Deadzone: See below
Deadzone: You will see that all sections on this page contain a parameter labeled “Deadzone”. Think of this as an inverted sensitivity slider. The higher this value is, the more intense the hardware input needs to be in order to trigger the corresponding mouse function. The higher the deadzone is for scrolling, the further you need to pivot the unit to trigger scrolling. The higher the deadzone is for clicking, the harder you must press with your toes and heels in order to trigger a click, and so on.
After you have adjusted all of the 3dRudder’s parameters to your liking, you will need to save them by clicking on the “Save settings” button at the bottom of the dashboard window. If you don’t save your settings, the next time you start up the 3dRudder or reboot your computer, the settings will revert to the factory defaults.
At this point the 3dRudder has been set up and is ready to use as a foot-controlled mouse!
An Important Extra Step For Accessibility Users
Even though the 3dRudder saves your mouse settings for future use, it does NOT save the fact that the device should be in Mouse Mode. In other words, if you unplug then replug the 3dRudder into your computer, or if you reboot your computer, the state of the device will always revert back to the default “Joystick” mode. There seems to be no way to change this behavior from the dashboard. For accessibility purposes, it might become a bit of a hassle to have to manually turn on Mouse Mode each time the 3dRudder is used. Luckily, Accessibility Hardware has come up with a not-so-elegant but very simple workaround that should greatly increase the chances that the 3dRudder automatically goes into Mouse Mode upon system boot-up.
This workaround will only address going into Mouse Mode upon system boot-up and only if the device is already plugged in at the time of system boot-up- it does nothing to make the 3dRudder go into Mouse Mode after it has been unplugged/plugged back in while your computer is on. If you are using the 3dRudder as your main mouse, however, you likely won’t ever be disconnecting the device, so this shouldn’t present any problems. This workaround was only tested on a Windows 10 64-bit system.
This workaround relies on a simple custom BAT file that can be downloaded here.
Workaround Quick Instructions
- Open Task Manager, go to the Startup tab, locate 3dRStarter, right-click on it and select “Disable”.
- Open your startup programs folder by pressing the Windows key and R simultaneously, typing “shell:startup” into the text field, and clicking OK.
- Download the BAT file and move it to a place on your system where it can stay permanently and won’t be accidentally deleted.
- Right click on the BAT file and select “Create shortcut” from the dropdown menu. Move the resulting shortcut into the startup programs folder.
- Done


When you turn on your computer after this, you will see the following window pop up containing a countdown. Don’t close or touch this window. Ignore it and it will close automatically when the countdown is over. After the countdown is done, the 3dRudder should start switching modes to Mouse Mode. After this, the device will be ready to use.
Workaround Detailed Explanation (Skip this if you don’t care about the technical details)
This workaround is effective because the initial 3dRudder dashboard installation creates a folder of useful shortcuts located at:
C:\ProgramData\Microsoft\Windows\Start Menu\Programs\3dRudder Dashboard\
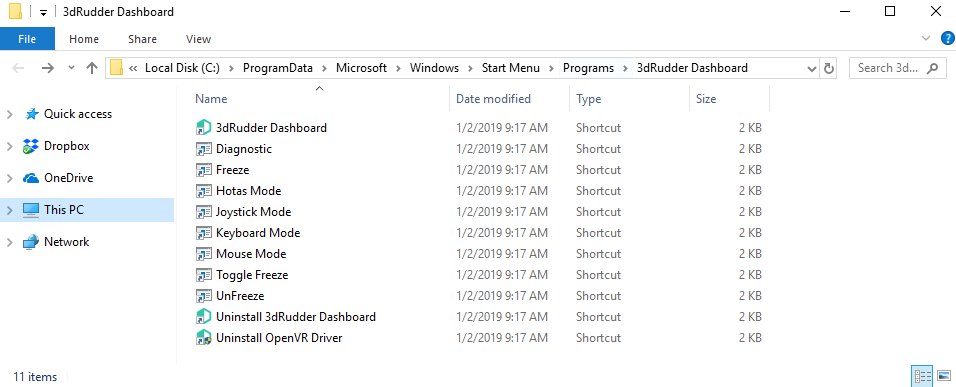
The two shortcuts needed for this workaround are 3dRudder Dashboard.lnk and Mouse Mode.lnk. The first one, Dashboard.lnk, is actually already set as a startup process when the dashboard is installed. It needs to be disabled (step 1 of the Workaround Quick Instructions) in Task Manager in order for it to not interfere with the BAT file.
The contents of the BAT file are as follows:
start "" "C:\ProgramData\Microsoft\Windows\Start Menu\Programs\3dRudder Dashboard\3dRudder Dashboard.lnk"timeout 30start "" "C:\ProgramData\Microsoft\Windows\Start Menu\Programs\3dRudder Dashboard\Mouse Mode.lnk"
- The first line is what will open the dashboard instead of the Task Manager.
- The second line creates a delay of 30 seconds in between the first and third lines.
- The third line triggers the “Mouse Mode.lnk” shortcut, which will result in the 3dRudder switching into Mouse Mode.
The ultimate goal of this file is to open “Mouse Mode.lnk”. However, opening “Mouse Mode.lnk” will only have an effect if the dashboard is already up and running, which is why the previous two lines are necessary. The first line may seem redundant at first glance, since it triggers the same shortcut that was disabled from the Startup programs in step 1. Why call “3dRudder Dashboard.lnk” from the BAT file instead of simply letting the Task Manager handle it? The reasoning behind this decision is that Windows systems are very varied, and often have many startup processes that take up a lot of time at boot-up. If the task of opening the dashboard was left up to the Task Manager instead of the BAT file, then a scenario could arise where the BAT file is run before the Task Manager opens the dashboard. The “Mouse Mode.lnk” shortcut could potentially be triggered before the dashboard has had a chance to start up. If “Mouse Mode.lnk” is triggered too early, then it will be ignored and the 3dRudder will remain in its default Joystick mode. Using the BAT file, the shortcuts are forced to be triggered in the correct sequence and with an appropriate spacing of time.
The timing of 30 seconds may end up being too short for systems that are on the slower side. If this workaround fails, the most likely reason for its failure is that “Mouse Mode.lnk” was triggered before the dashboard was ready. The way to address this is to simply increase the time delay between the dashboard being triggered and the Mouse Mode shortcut being triggered. Open the BAT file in a plain-text editor (eg: Notepad), change the 30 to a higher number, save the file, then try rebooting again.
DISCLAIMER: While effective, the workaround instructions and BAT file presented on this page are the sole creations of Accessibility Hardware and have not been in any way endorsed by 3dRudder.
What To Expect When Using The 3dRudder
When it comes to the movement of the mouse cursor, the 3dRudder has zero learning curve. You will master that part of it instantly. Tilting the device to move the mouse cursor is exceptionally fluid and intuitive, and the “Exp” feature makes fine mouse movements easy to accomplish. The learning curve kicks in when you try to click and scroll. Pressing my left heel and right toe into the device to left-click felt very unnatural at first, and it felt even more unnatural to have to wait for the device to cycle through the different click types. I made countless instinctive attempts to double-click by pushing my feet into the device multiple times. It was all very frustrating. But eventually I got used to how the device works and was able to operate it without any trouble. If you have trouble using the device or keeping the pointer steady when clicking, the first thing you should do is adjust your sensitivity settings in the dashboard.
Scrolling with the 3dRudder was my least favorite thing to do with it. In theory, scrolling is a very simple action. Simply pivot the device clockwise or counterclockwise. In practice, however, I had a difficult time keeping the 3dRudder level while pivoting it. I would always tilt the device a little bit while pivoting it, resulting in a simultaneous scroll/cursor move, which led to the cursor straying away from what I was trying to scroll or me scrolling something I wasn’t trying to scroll. I am unsure if this is a design issue or a practice issue. If I used the 3dRudder on a regular basis, AND really experimented with the sensitivity settings, I’d probably be better at scrolling. Another issue related to scrolling is that the unit tends to slide backwards towards the user when being pivoted back and forth. This never presented a problem for me, but may annoy some users.
The 3dRudder is constantly calibrating and re-calibrating itself. There will be moments when it seems to skew the mouse cursor to the side, or refuse to click, and when something like that happens, simply take your feet off the device and wait a few seconds. It will calibrate itself and give you a few beeps to let you know when you should put your feet back on.
The 3dRudder beeps and it beeps often. It beeps when it’s calibrating, it beeps when it’s ready, it beeps when you take your feet off it, it beeps when it’s clicking. Despite how often it beeps, the noise level is non-intrusive. If you find the beeps to be too much, you can easily disable them in the dashboard. It’s advisable that you familiarize yourself with the controls and with your own personal configuration before turning the sounds off, as they serve to inform you of when the different types of clicks have occurred, as well as other useful information.
Pros
- The relationship between the movement of the mouse pointer and the tilt of your feet is exceptionally fluid. The 3dRudder feels very natural to use in this regard.
- Very self explanatory dashboard. Labels, hints, and second-by-second instructions are present throughout the 3dRudder experience.
- Adjustable sensitivities for every individual aspect of the mouse input (pointer speed, click speed, scrolling speed, sensitivities, etc…)
Cons
- Demands a high amount of precision and coordination of both feet
- Unit tends to slide along the floor towards the user when scrolling (ie when pivoting the unit back and forth with the feet)
- Switching the default Mode of the device from the dashboard isn’t possible- the user must use a workaround
- Parameter adjustments are not instantly applied. User must apply the settings manually each time they change something.